Wednesday, February 18, 2015

CREATE: My Pom Pom Heart

I almost forgot to post this cute heart shaped pom pom that i personally created for our Valentine's Party last year in our church. I thought of using my left over materials so it will be much cheaper..i only bought the Japanese paper here. I decided to make one sided heart shaped pom pom only so i used a styropor as the base to avoid wasting or using so many Japanese paper as compare to a whole heart shaped pom pom. Its not as light as the 'all paper' pom pom though but it worked well for me and it saved me some money.(Please See Instructions below)

INSTRUCTIONS:

1. Materials: red japanese paper, scissors, glue, ribbon or string & heart shaped styropor
2.Cut the Japanese paper into small strips.
3. Apply glue on the styropor.
4. Fold each strip in half then gently stick the center fold onto the surface.
5. Stick on the next strip close to each other to create volume.
6. Continue Step no. 5 until you fill up the surface of the styropor.
7. Paste the remaining red japanese paper strips on the side of the styropor to create a clean look then put a ribbon behind it for hanging to finish the heart shaped pom pom.

Since Valentine's Day is over maybe you can make this for your next party.
HAPPY LOVE MONTH!!!!  still...(^ ^,)

ART, Me & my baby


Its a wonderful feeling seeing my son enjoying the talent God has given him. As soon as he found out about this Android App Picasso he never fails to draw anything in a day. Can you guess how many drawing he has now? ...One thousand four hundred plus (",) huh! a lot! the storage of my phone is almost full because of that but of course I am happy because he is happy. I'm so glad that i got this for him it's so easy to use that my baby can't wait to get his forefinger on and started doodling (he was about 3 years old when he had his first doodle). ..one of the best Art App for kids. I started introducing him to arts and crafts at a very young age i think he's 2 years old then; we had watercolor painting time, stamping using rubber & vegetables, cutting different shapes and objects.  I know from the very start that he is into arts, extremely talented kid..i just knew it (",) ha ha! Of course I'm proud of my baby. He's 5 years old now and learning so many things around him. He's fond of cars, city, roads & construction. Sometimes he draw what he remembered from our travel; mountains, sea, buildings or just about anything. I'm really excited of what he will draw next. 
Hope you are having a creative week so far!=)

Monday, January 5, 2015

Color of the Year!

                                       Kaleidoscope Art using Picasso Kaleidoscope App
Hmmm..not really a fan of red shades but of course i can use any color for my artwork. They call this tone Marsala - earthy wine red, terracotta red. It brings warmth and and great accent to other colors.  I often see this color for nails and lipstick shades... I think i can handle you Marsala=)
May our year be full of colors!HAPPY NEW YEAR!

Thursday, December 18, 2014

Thank You! #grateful


                                                           acrylic on 5x3 card stock paper
I know i should have used water color on watercolor paper=) I guess its time to shop for new watercolor supplies soon but i think it worked out well=). Created these mini cards for my awesome friends at church to appreciate & thank them for giving their hearts to serve & for being partners in the gospel. Let's be thankful for all the blessings that God has showered us this year especially our family & friends. Have a wonderful happy weekend!

Thursday, December 11, 2014

MERRY CHRISTMAS!

    
 cross stitch inspired pattern to welcome the season=) Enjoy your Holiday!

Wednesday, December 10, 2014

Arrow? chevron?=)

         updating background with my new design #arrow

ART, Me & my baby


These are some of my drawings using  this fun app 'PICASSO'. It's user friendly and love how simple it is that even my almost 4 year old son can express his drawings too.  

 Look how cute this is =) I have to write his age here so i wont forget when he drew this cute face
This is 'us' according to him =)

Have a colorful & creative week everyone!

Tuesday, July 1, 2014

CREATE: 'Our' wedding invitation


The wedding month is over! This is kinda late but i just want to share this anyway.
I was looking at some of my craft boxes then i saw these wedding invitations that i'd created for my siblings. Of course i made our own wedding invitation too. We are now on our 5th year as husband & wife and we have two cute little boys. I always thank God for letting me meet my wonderful husband. Being married to him is a blessing from the Lord. I know that even before we got engaged it was already in my dream wedding list that i will design & make my own wedding invitation (top: in turquoise), our wedding favors, i designed my own wedding gown and our cake. I love to be involved in everything especially in designing and creating things for our wedding.  But I never thought that actually preparing and doing it was really tiring and exhausting but of course i was very excited then. Thank God my husband was there all through out and one of my best friend that helped me with other things especially during the wedding ceremony. Anyway, i was just saying that it was my joy that i was able to create my sibling's invitations and their wedding favors as well. I also hosted the reception of my twin brother's wedding. I believe they're happy and encouraged that i made it for them haha!!!i know!.. (they thanked me=)).. i actually volunteered =). It was also my way of helping them checked out one of their "to do list". I had a lot of fun doing it... For the love of  family!

Welcome July!

Beautiful You


These are some of my digital design that i made as 
a backdrop to one of our church event. 
I submitted three samples of my concept and they liked the third design. 

Wednesday, July 11, 2012

CREATE: a day of encouragement...=)


 Hi there! Just wanna share these birthday cards i made for my friends. These are just simple ways to encourage and uplift their spirit..


Every time there is birthday celebration or baptism in our campus ministry at church i am thrilled and excited to make cards for them. Thought of making an accordion instrument inspired card because we usually give one big card to the celebrant where everyone can write their words of encouragement and this was one of them=). 


This card was created using paper scrap, corrugated paper to add texture, glue and  a puncher. I hand cut the flower and butterfly. And i punched holes on the edges to create butterfly path.


Accordion Card

                    I love these colors together..they're my favorite ones especially the turquoise/aqua..


My husband bought me a book ' Expressive Handmade Books " by Alisa Golden. Her book teaches wonderful techniques and materials in creating handmade books. I'm excited to learn from her. It's inspiring!


One technique i knew even before i saw it in her book is the accordion. I never knew it was called accordion though..haha!!! but one thing i know for sure is that this book gives me creative ideas for my next projects.
Two Connected Accordion Card
To make it longer and provide more space, i made two connected accordion card with eight panels. This was just made of brown folder, a little help from my glue and marker.

10 Easy steps: ( for more instructions, read 'Expressive Handmade Books' by Alisa Golden)

1. Cut the brown folder into two.
2. Measure the desired size of the card.
3. Fold the first folder in half, widthwise. Open. Make sure this folder is one inch longer than the other.
4. Fold the extra one inch then matching the cut end to the fold with one inch folded inside.
5. Fold the ends to the center fold, one end at a time. You should have valley,peak, valley folds, forming a
   "W".
6. Fold the shorter folder in half.
7. Fold the ends back to the center fold, and crease, making sure they are aligned.
8. Apply a thin layer of glue to the front of  first folder (the peak side).
9. Set the second folder on top of the first folder so that the edge are aligned. Press down (the folder1 will
    be hidden behind the second folder)
10. Then design it your way.


Have a great day everyone!=)

Sunday, June 3, 2012

CREATE: BuTtons Up!

BUTTONS! buttons! lots of buttons..these colorful, cute, tiny buttons are one of my favorite crafting must have. They are fun and very useful. 


Here are some of my button-inspired creation and a peek of my first ever distressed look card. =D 


Notice the edges of the circles...i used stamping ink with a sponge to give it a distressed look layered together with these coconut shell buttons which are one of my favorite in the bunch that suits perfectly to achieve an aged look of the card.  


This flower was hand cut by me using Paper Royal Flamingo and curled up the edges a little bit then used distressing ink. Then embellished with purple striped ribbon and a button on the center.With corrugated paper underneath to add texture and silver trim to soften it up and to add spark to it

Hope you learn something new today. Have a great week everyone!

Sunday, May 27, 2012

looking for InSpiRatiOn...???

It's good to have books around that will help you get inspired to do things that you love. And lately, i'm kinda stuck and lost!?...undecided...sometimes i wanna paint, make handmade cards, finish my scrapbooks... (notice the 's'!) haha! it just means there are lots of them. And obviously i am not posting anything for so long now.. =(

while looking for inspiration...i found these colorful buttons and trims from my craft box...hmmm?..i wonder what will happen to them soon..

i think it is time to create and work! work! work! see you next time with my button inspired creation...=)


Thursday, March 31, 2011

ONE + 100


Yahoo!!! my blog turns 1 today! and my Facebook fan page reached 100! Cool !!!..(",)
Happy anniversary Jhoanna’s Craft!!!


I remember last year when i decided to start this blog. Spring just started in Chicago and it was just almost two months after I gave birth to my baby Jaden during winter time. I was just staying at home then and taking care of my newborn baby. We only got a chance to hang out with our friends during weekend because it was still cold outside for the baby. And despite having TV, internet in the house and my cute baby of course to keep me occupied, there was a time that I still get bored and wanted to do something else. I thought of buying watercolour, paper and other tools I need to paint. I miss making paintings already. I think the last time I made real ones was years ago, I mean like 5 years??.. My husband suggested to me to start creating a blog for my artwork. So I started working on my paintings even prior to Jaden’s birth. Along the way of creating my blog was a learning process for me, even up to now I’m still learning so many things. It’s a great experience. I really enjoy blogging though I know I am guilty of not posting regularly..hahaha!!! I am having so much fun with this cause I get to share my artwork to you =) I thank God for the talent He has given me and for my super supportive husband.

Thank you for all your encouragement and support. Let’s appreciate ART everyday.

Cheers for my ONE year!

Happy blogging everyone!

Tuesday, March 29, 2011

CREATE: Wall aRt


I was browsing through my photos and saw these wall arts i made 3 years ago...just thought of sharing these to you. I used to work in a Center-based (non- government organization). I really miss working there. Love the place; love the people and the children too. Volunteers usually come to help out and mingle with the kids for a month or two. That year before i finished my contract there, i got the chance to meet 3 beautiful European volunteers from Denmark. We had such a great time with them. They stayed like 6 months with us.

 
But their stay was up and it was time for them to leave. We usually celebrate farewell party to encourage and give thanks to our volunteers. I was asked to make something that would encourage them. It was just a simple way of appreciating their heart and effort in serving the children. I created these wall art using chipboard as the base card and wrapped it with abaca and put embellishments on it like fancy flowers and leaves, coconut buttons, beads, shells, marble, white sand, paper twine to hang them and wrote inspiring quotes using watercolor that encouraged them so much.


I think it's a great idea to make one dear friend smile this week. Why don’t you make one? Hmmm...which reminds me of my friend who will be celebrating her birthday soon..

Have a creative week everyone!=)


Monday, February 14, 2011

CREATE: making memories...


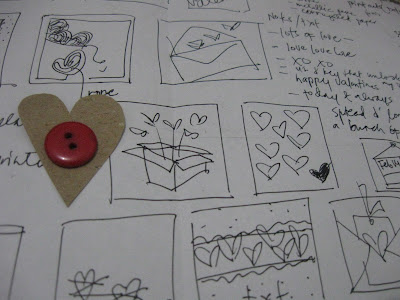
Just thought of sharing what made me busy this month.... Making memories =) Every year we all make effort to have that special moments with our loved ones and one of those is the month of LOVE -February-...


with the help of my creative tools that loves to
make memories and sketch pad...
i decided to
make my handmade Valentine's cards...


look how messy my working table was..hahaha!!!but seriously, these were the moments
that i can relax despite of being busy thinking, creating, and designing my cards..=) i love it!


Below are the Handmade Valentine Cards that i made and sell during our Valentine's devotional at church..


Tadahhh!=)


these cards were sold out =) It was a fun experience and I was so encouraged.


Hope you also has something creative to share this Valentine's day.
Have a great day!=)
Related Posts Plugin for WordPress, Blogger...